Introduction
When managing infrastructure in a sovereign cloud environment, controlling who has access to your resources is the most critical security step. On the LYNIO Cloud Platform, this is managed by Lynio IAM—our built-in identity and access management service.
As a LYNIO customer, you don't need to be an identity expert or write complex code to secure your organization. The LYNIO Web Console gives you a simple, powerful dashboard to manage your users, configure security compliance, and securely connect external applications.
In this guide, we will walk you through a complete, step-by-step setup to secure your LYNIO tenant and hook up your first application.
Step 1: Navigating to the Identity Dashboard
Once your LYNIO organization is provisioned, you can access your dashboard:
- Log in to the LYNIO Web Console.
- From the main sidebar, select the Identity & Access Management page (or navigate directly to
/identity). - You will see a clean dashboard with tabs for Users, Roles, Applications, and Settings.
Step 2: Enforcing Password and Lockout Policies
Before inviting your team, it is best practice to set up the rules for account access.
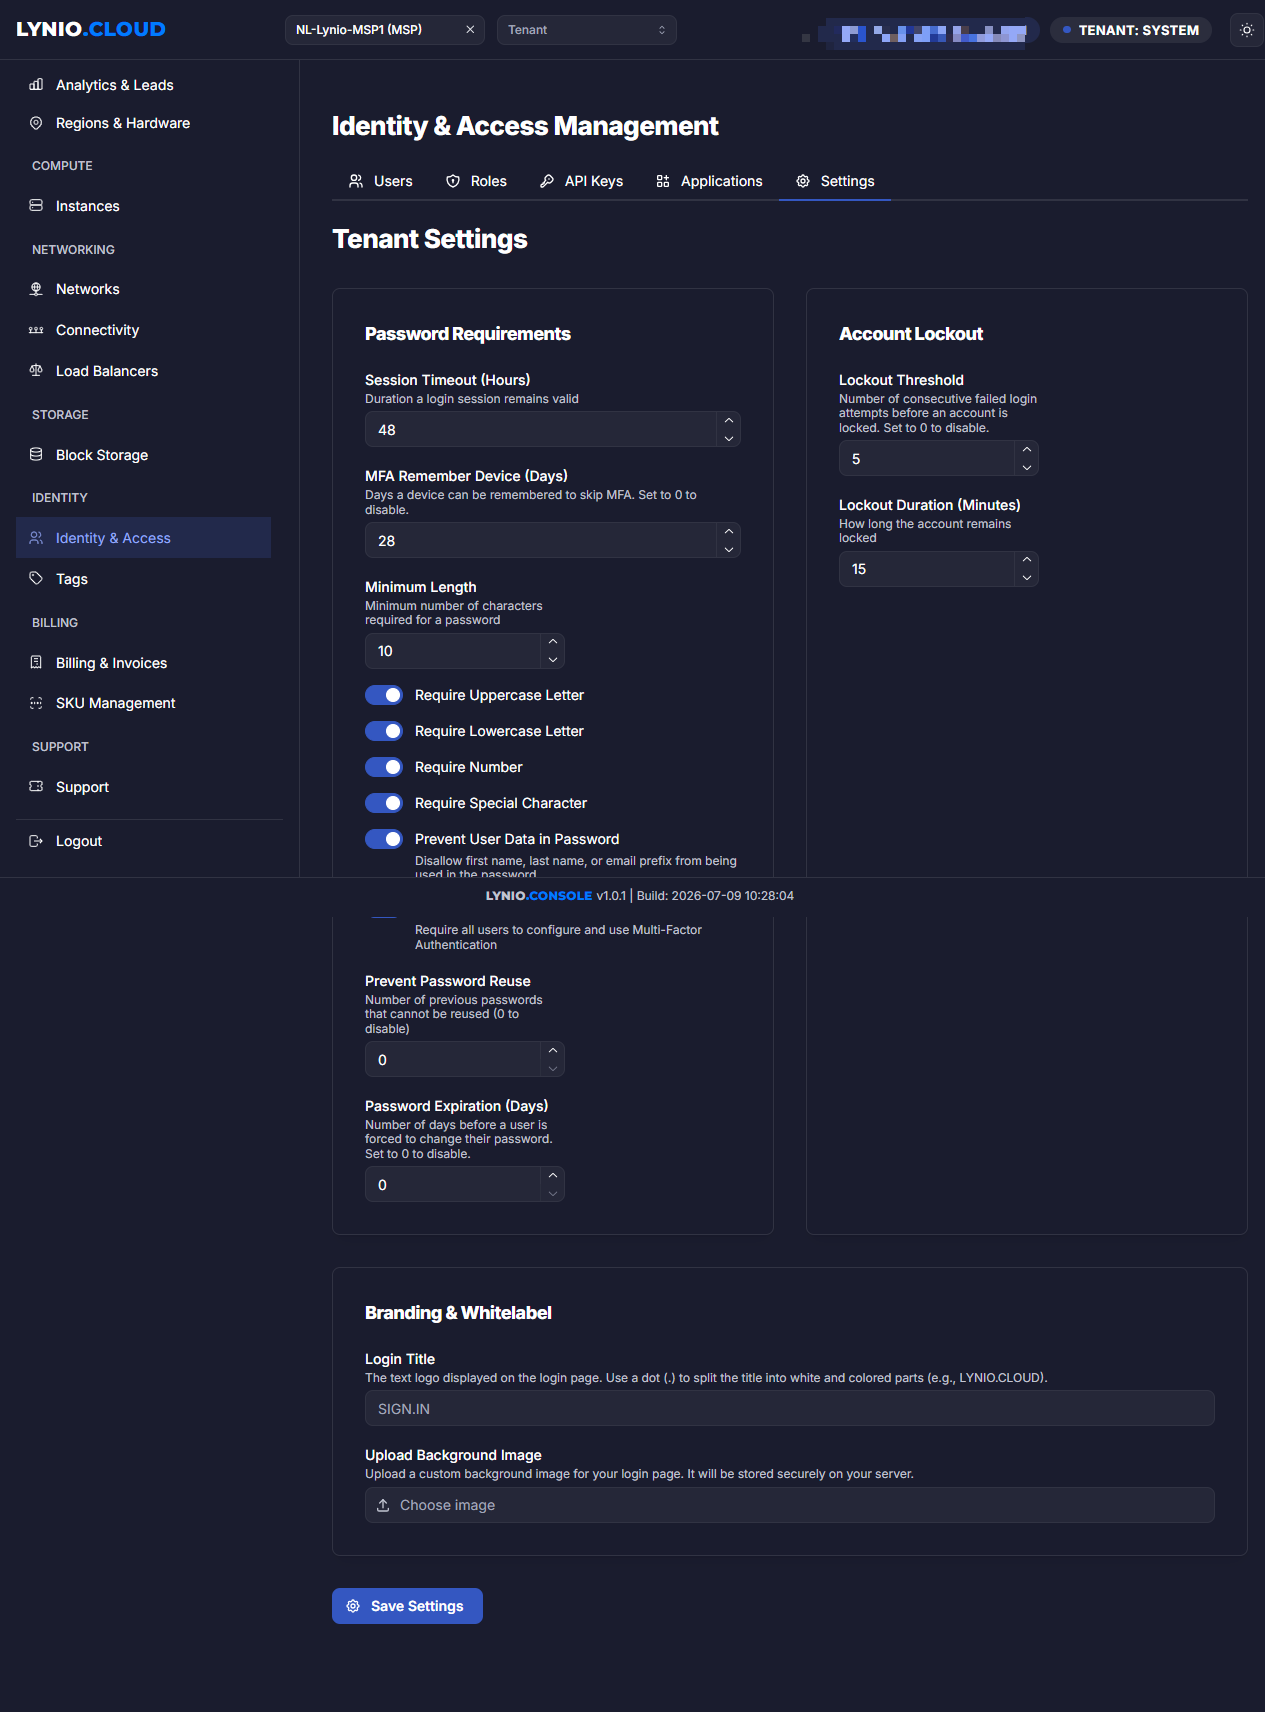
- Click on the Settings tab.
- Under Password Requirements, customize the strength criteria:
- Define the Minimum Length (we recommend at least
8characters). - Enforce complexity switches: Require Uppercase, Require Lowercase, Require Number, and Require Special Character.
- Toggle Prevent User Data to block passwords containing the user's name or email prefix.
- Define the Minimum Length (we recommend at least
- Under Account Lockout, set the thresholds to prevent brute-force attacks:
- Lockout Threshold: The number of failed login attempts allowed before the user is locked out.
- Lockout Duration: How many minutes the account remains locked.
Step 3: Setting Up Multi-Factor Authentication (MFA)
To guarantee that only authorized users can access your infrastructure, you can enforce Multi-Factor Authentication (MFA).
- In the Settings tab, toggle Force MFA to active.
- Configure the MFA Remember Device setting (in days):
- This allows users to check a "Remember this device" box during their MFA login, placing a secure, temporary token on their personal browser.
- Set this to
30days, for example, to balance security with user convenience. If you set this to0, MFA will be required on every single login.
Step 4: Personalizing Your Login Screen (Branding)
You can customize the look and feel of the login screen that your team sees when accessing LYNIO:
- Scroll down to the branding section in the Settings tab.
- In the Login Title field, enter your company name (e.g.,
MYCOMPANY.CLOUD). - Upload a custom Background Image matching your corporate design (supports JPG, PNG, and SVG).
- Click Save Settings at the bottom of the page.
Your team will now see your custom title and background whenever they log in.
Step 5: Creating Custom Roles
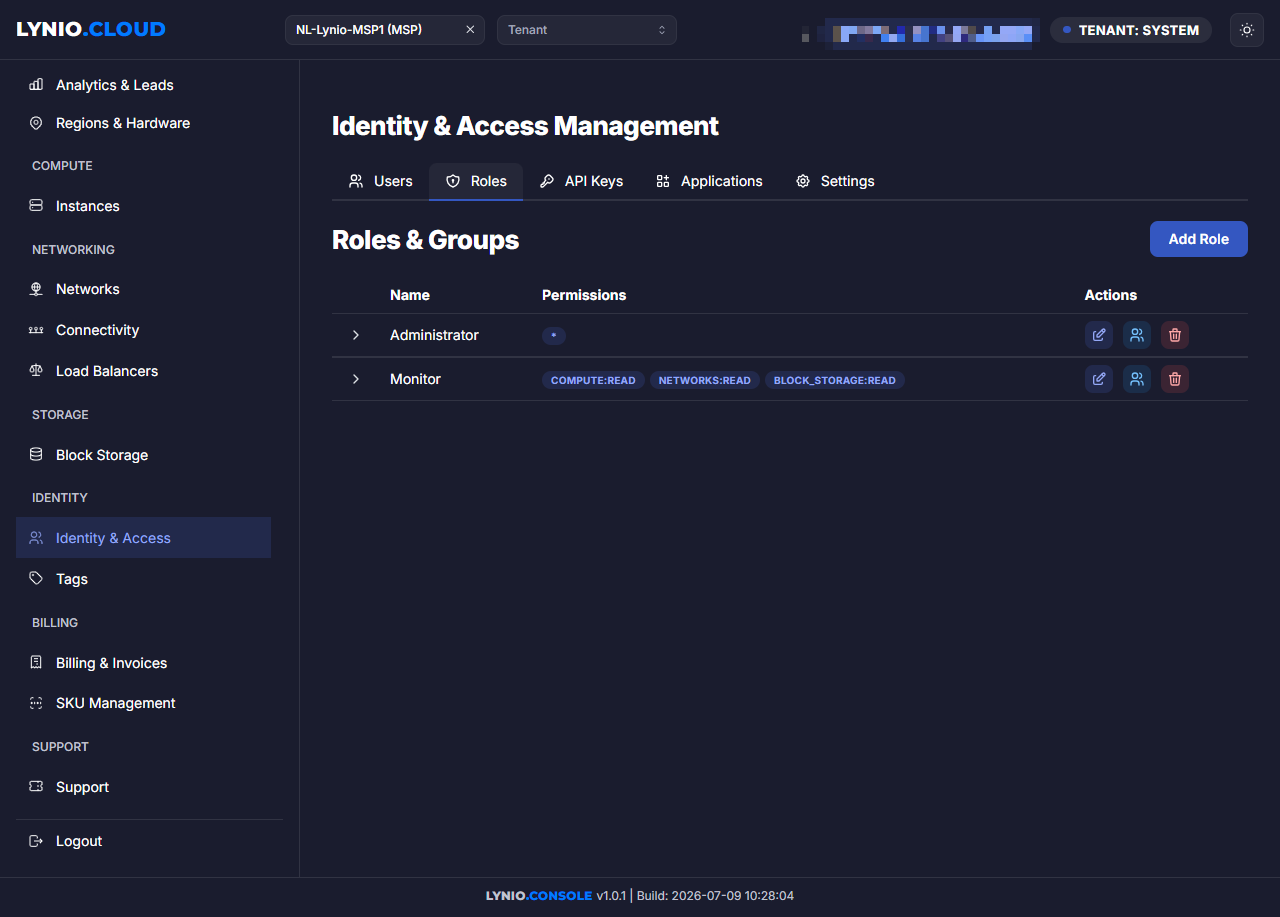
Permissions in Lynio IAM are organized using roles. Instead of assigning individual permissions to users one by one, you group permissions into a role.
- Go to the Roles tab.
- Click Add Role.
- Name your role (e.g.,
DeveloperorAuditor). - In the Permissions field, enter your required scopes as a simple, comma-separated list (e.g.,
compute:read, compute:write, network:read). - Click Save.
Step 6: Inviting Users and Assigning Roles
Now that your security policies and roles are in place, you can invite your team members.
- Switch to the Users tab.
- Click Add User and fill out their details: name, email, phone, and an initial password.
- Once the user is created, click the Manage Roles key icon on their row.
- Check the box next to the roles you want to assign to them (e.g.,
Developer) and save. - Auditing Access: You can monitor user sign-ins at any time. Simply click on a user's row to expand it, and you'll see their UUID along with a log of their last 20 login attempts (showing the date, IP address, and browser they used).
Step 7: Connecting External Applications
If you want your team to log in to external services (like a self-hosted Git repository, a documentation wiki, or a monitoring tool) using their LYNIO credentials, you can register them as applications.
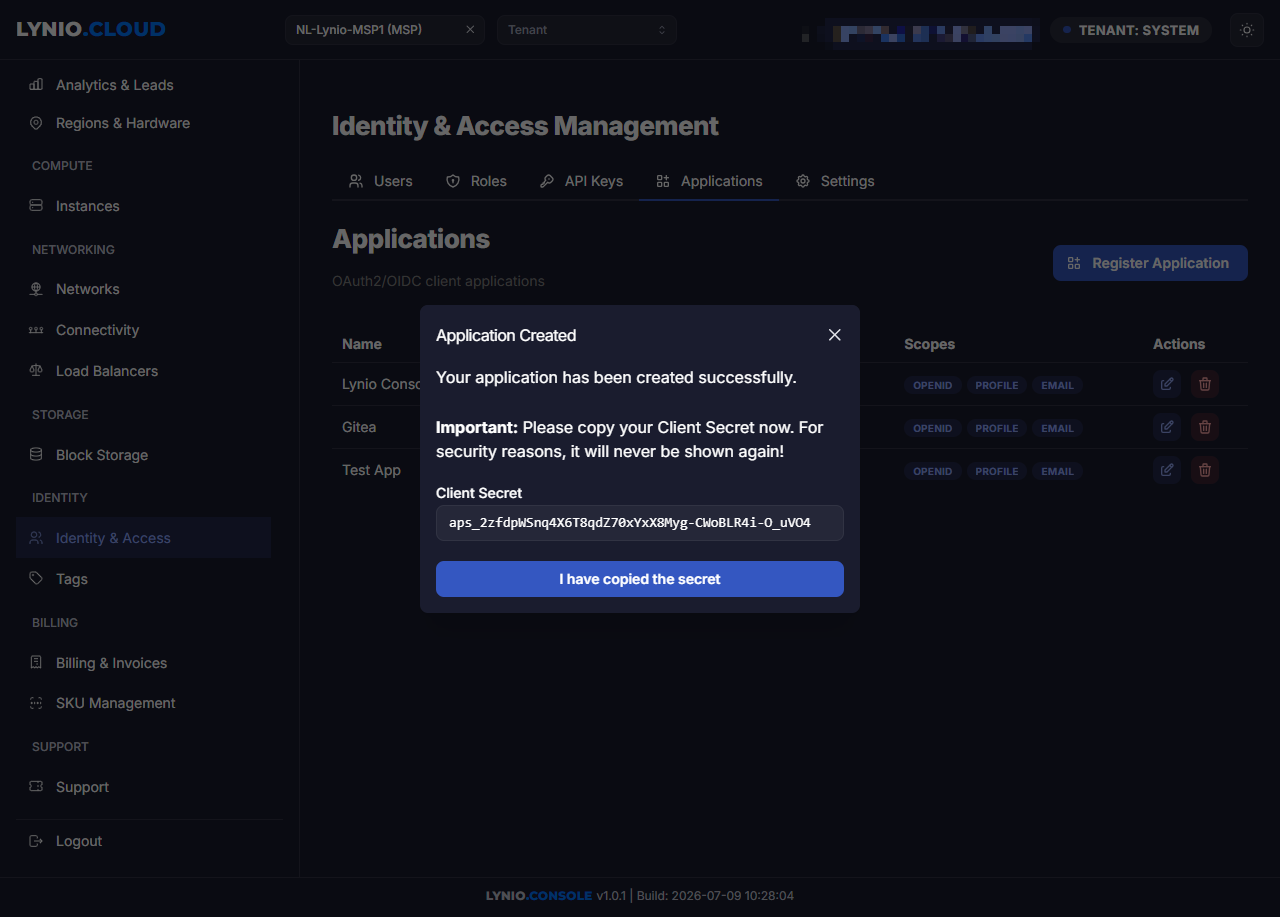
- Head to the Applications tab and click Register Application.
- Provide a Name (e.g.,
Gitea) and allowed Redirect URIs (the callback URLs provided by your application). - Select the Application Type:
- SPA/Mobile (Public): Choose this for frontend-only web apps or mobile apps.
- Server-side (Confidential): Choose this for backend applications running on a secure server.
- Click Register.
- Important: If you registered a Confidential application, the console will display your Client ID and a raw Client Secret.
Note: For security reasons, the Client Secret is shown exactly once. Be sure to copy and save it securely right away. Lynio IAM stores this secret encrypted, so it can never be retrieved or displayed again.
Conclusion
Securing your cloud environment doesn't have to be a headache. With Lynio IAM, LYNIO customers can easily manage team access, whitelabel the login experience, enforce MFA, and hook up external developer tools. By spending just a few minutes in the LYNIO Web Console, you can establish an enterprise-grade security perimeter for your sovereign cloud infrastructure.